The long tail casting on method is a popular way to cast on stitches for a knitting project. It is also known as the Continental, European or German casting on method.
Variations of long tail casting on method
Growing up, I actually thought this casting on method was the one and only method, for I only ever say my mother and grandmother – both great knitters – use this method. It was only later that I found out there are many many other casting on methods and also variations on this one. Here, I will show you the long tail casting on method as I know it, step by step.
Before you start casting on
As the name of this method already gives away, you need a long tail end, which will be part of the stitches you cast on. As you go, the tail end will shorten. So before you start, you need to estimate how long your tail end needs to be for the amount of stitches you want to cast on. This is in my opinion the trickiest part of the whole method. I sort of eyeball it. It is always better to have your tail end too long than too short and prevent having to start over again.
Long tail casting on – step by step
Once you have estimated the length of your tail end, go ahead and make a slip knot in your yarn. If you need help making a slip knot, just follow the steps in the pictures.
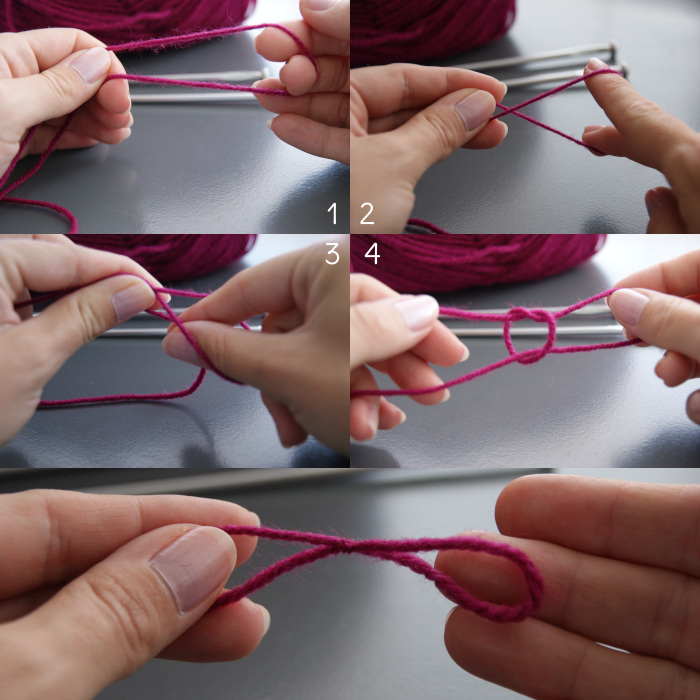
1 Pick up your yarn, fold it so you get a loop
2 Twist that loop
3 And pull some yarn that leads to the ball through the loop
4 Pull tight. If you can slide the knot up and down the yarn, you know you did it right.
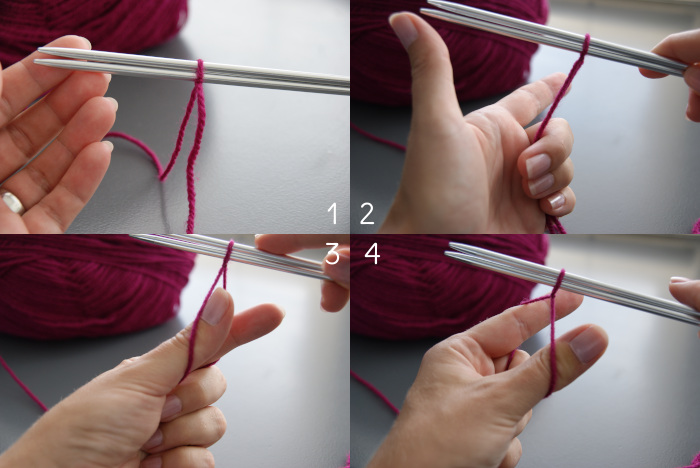
Slide the slip knot over both knitting needles, that you hold side by side in your right hand. Some people use only one needle, but I use both of them to ensure the stitches are loose enough. Now, before you continue to cast on stitches, make sure that the tail end is the one facing you and the thread that goes to the ball is in the back. The slip knot already counts as your first stitch.
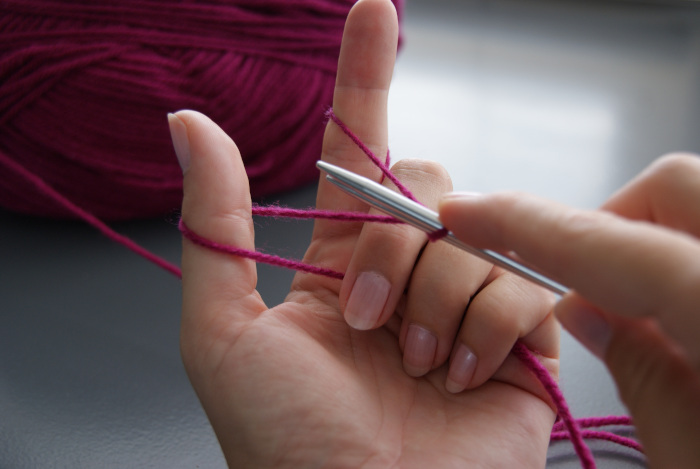
The long tail casting on method requires a certain hand position. Grab both yarns with the bottom three fingers of your left hand. Use your left index finger and thumb to split the two yarn threads. The long tail end now goes around your thumb and the yarn that goes to the ball goes around your index finger. See the photos below.
Rotate your left hand so that the palm is facing up. The yarn threads now look like loops around your thumb and index finger. With this hand position, you are ready to start casting on.

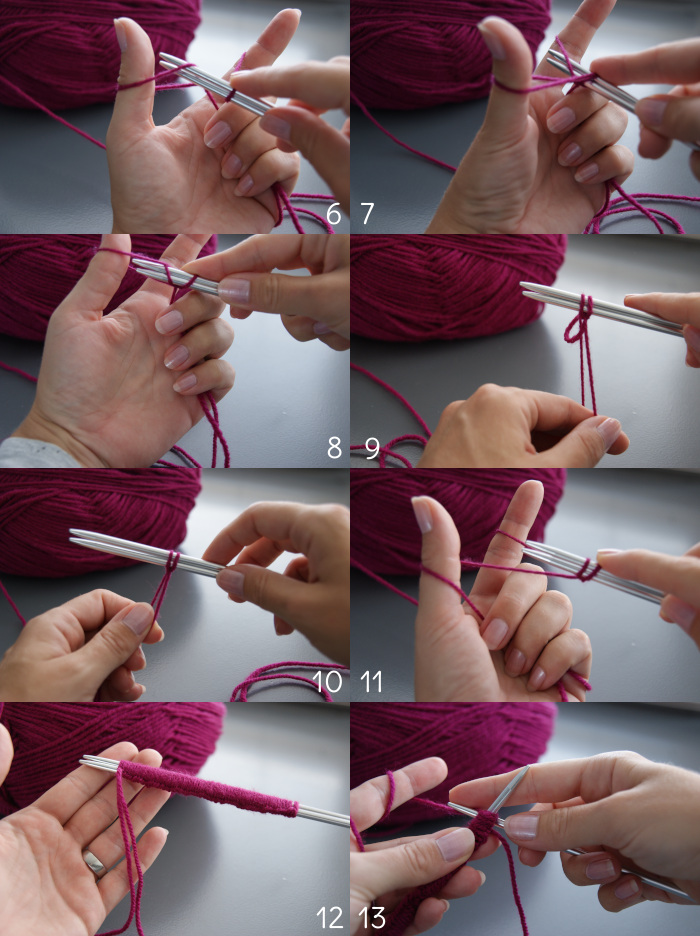
Move your needles (just think of them as one) towards you, go under the thread closest to you from front to back and come up through the loop around your thumb. Then move the needles over to your index finger and go down through the loop on your index finger.
Then go down through the loop on your thumb and pull the yarn ends to tighten your new stitch on the needles. Repeat these steps for the amount of stitches you want. Always make sure that both needle tips go through each loop. When you are ready, you can just pull out one of your needles and start knitting.
Pros and Cons
With this method, you get a nice elastic edge that is comfortable for clothing and socks. The risk of this method lies in the beginning where you have to estimate the length of the tail end. You would not be the first one getting to 248 stitches and realizing there is not enough tail end for the last two stitches. Luckily, there are several tricks for estimating the length of the tail end as well! I will write an article on that soon.