Most likely, you have already come across the term ‘gauge’ numerous times, but what does it mean and is it important? Find out everything about knitting gauge here and how to fix it when it is off.
What is gauge?
Gauge in knitting refers to the number of stitches and rows per square surface, usually expressed per 10 cm2 or 4 inch2. Therefore, it is basically a measurement of the size of individual stitches or groups of stitches in a particular pattern.
Gauge in knitting patterns
As you may have noticed, a recommended gauge is often given with patterns. To produce a garment with the same dimensions, you need to knit with the same gauge. When your gauge is off, the garment may end up to be bigger or smaller than intended and might not fit. So to get the right gauge, is pretty important.
What affects gauge?
Gauge is dependent on a number of factors, like yarn, needle size, individual knitting tension and the pattern. Thicker yarn and larger needles produce larger stitches. So do loose knitters. Also, some patterns, like ribbing and seed stitch, pull in when compared to plain stockinette stitch, producing relatively more stitches per square surface.
How to check your knitting gauge
The way to check your gauge is by making a swatch before you start your project. This is a small sample of knitwork, that is big enough to easily measure your stitches. Aim for a square of about 14 cm2 or 5.5 inch2. Alternatively, you could look up the suggested gauge in your pattern and add 8 stitches and rows to those numbers. That should be big enough. Obviously, you should use the yarn and needle size that you want to use for your project.
When not instructed otherwise in your pattern, use a stockinette stitch for your swatch (= knit stitches on the good side and purl stitches on the wrong side). If you like an extra fancy swatch, you could make a garter stitch border, that will prevent your edges from curling up. Just work about 3 rows of garter stitch at the beginning and end (= only knit stitches on both sides). For the middle part, work 3 stitches of garterstitch at the beginning and end of each row and work the rest in stockinette stitch.
Wash your swatch
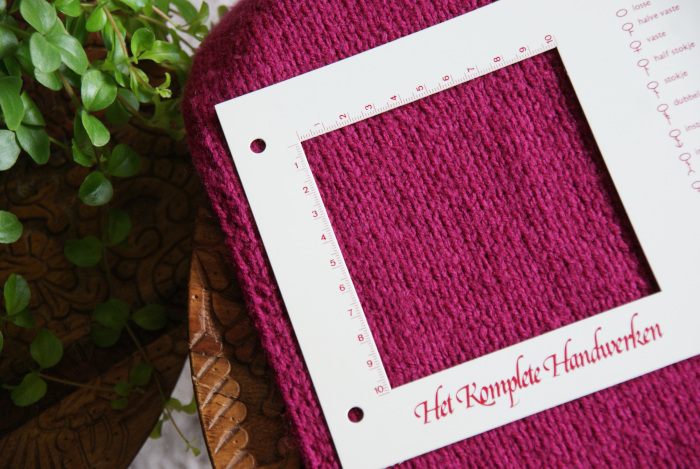
When you’re done, it is best to wash your swatch as you would your finished garment and let it dry flat. Stitches change slightly when washed, so it is important to not skip this step. When it’s dry, you can measure how many stitches and rows you have in 10 cm2 or 4 inch2. Just use a ruler or a gauge square, as shown in the picture.
Perfect knitting gauge
Do your numbers match the suggested gauge in the pattern? Great! That means you can get started with your project. Alternatively, if there is a significant difference, you can try to fix it by changing your knitting needles or, if that is not enough, your yarn.
Fixing Gauge – too many stitches?
When you have more stitches and rows per square surface than you should, your stitches are relatively small. You can switch your needles to a bigger size and see if that is enough to correct the gauge. When that does not help, you might want to consider thicker yarn.
Fixing Gauge – too few stitches?
Alternatively, when you have less stiches and rows per square surface than you should, your stitches are too large. See if you can use smaller needles to fix this problem. Perhaps you have chosen a yarn that is too thick for this project and have use thinner yarn to get it right.
Can you skip making a swatch?
If you are making a scarf, you don’t really have to make a swatch first. A slightly larger or smaller scarf is not much of a problem. If you are making a fitted garment and the size is important, it pays off to put in the effort.
You’re a very practical website; could not make it without ya!
Thanks! I am glad I could help you 🙂