I really like the cable cast on method in knitting. As the name suggests, this method produces an edge that resembles a cable. I think it is beautiful! If you would like to learn how to do this type of cast on, I will show you step by step.
Cable cast on – step by step
Starting this casting on method is easy, just make a slip knot and you are ready to go. If you like some help making a slip knot, here are the step by step instructions.
Once you have it, place the slip knot over your left knitting needle. The slip knot already counts as your first stitch. You will use the right needle to cast on the stitches. Insert your right needle into the loop of the slip knot as if you would make a knit stitch. Yarn over and pull up a loop. Pull the loop longer and transfer it to your left needle from back to front (see pictures). I find it helpful to think of the right needle rotating clockwise so I can insert the left needle in the back of the loop. Now pull the loop smaller so that it lies neatly next to the slip knot. Now you have two stitches already.

1 Place a slip knot on your left needle and hold as if to make a knit stitch
2-3 Insert your right needle into the slip knot as if to make a knit stitch, yarn over and pull up a loop
4-6 Pull the loop larger and transfer it to the left needle from back to front
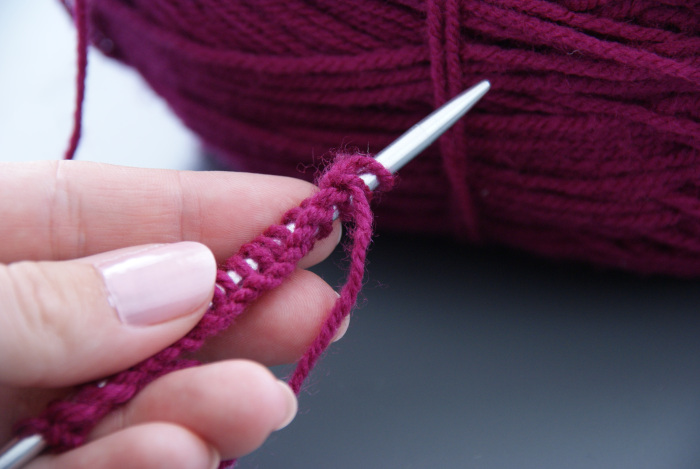
7 Pull tight. There is your new stitch
For the next and all following stitches you repeat these steps, but with one tiny difference. Instead of inserting your right needle into the last stitch, you put it in between the last stitch and the stitch before that. Just keep scooping up yarn from between the stitches and adding it to the left needle to create a beautiful cable like edge.
I find it easier and faster to already put my right needle in place between the stitches before I completely tighten the newest stitch.
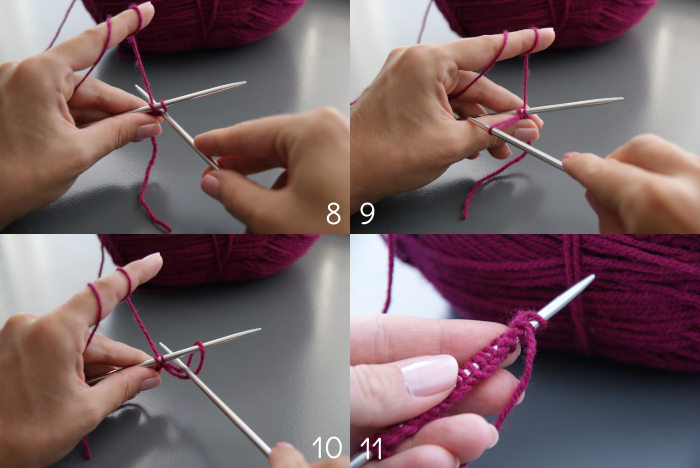
8 For all following stitches, insert the needle between the top two stitches instead of through one
9 The other steps remain identical
10 Tip: It is easier to insert your needle between the stitches just before you tighten the newest stitch
11 The result is a beautiful cable like edge
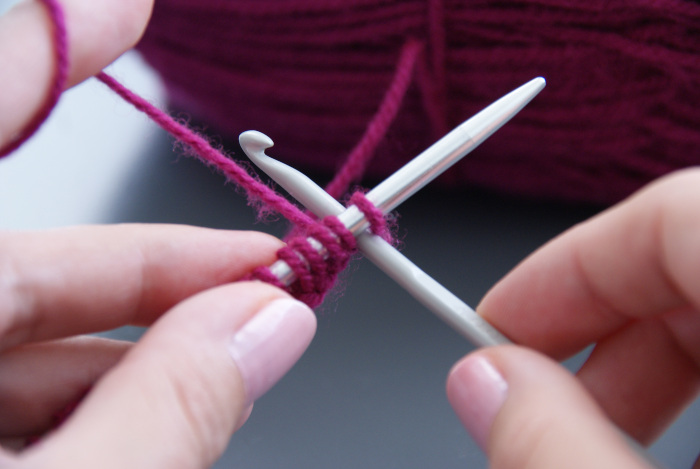
Using a crochet hook to cast on stitches
If you are having trouble scooping up yarn with your knitting needle, you are probably working a bit too tight. You could try loosening the tension a bit or, easier still, you could replace the right needle by a similar size crochet hook. I find it very easy to scoop up the yarn this way.
Variations of cable cast on knitting method
It is also possible to place the new stitches on the left needle in the opposite direction, from front to back. Instead of rotating the right needle clockwise (photo 3-6), you can keep the tip to the left and transfer the stitch with both needles tip to tip. Whichever way you choose, stick with it.
Pros and cons
This method produces a beautiful edge and is quite easy. It does not require a prior estimation of the lenght of the tail end as for the long tail cast on method. On the downside, it is not as elastic, making it less suitable for projects that need stretchy edges, like hats and socks.